Hey! So this is a tutorial I have been meaning to write for a while now and I will try my best to cover the most common problems I see people make when XGen is involved in their pipeline. It is important to note that the techniques I will mention in this tutorial are not the only way to tackle XGen and I'm sure there are many alternatives out there, however this tutorial will hopefully guide you through the whole process - from set up to rendering - in a way that proved itself very stable for me during my time as a student. This is gonna be a long one so i'll split it into a few parts and hopefully when I have some more free time I may record some video tutorials to help you out! Also, this tutorial is mainly focused on character grooms that use guide curves but much of the tutorial is still relevant regardless of what type of groom you wish to make. Final note I need to make clear, the grooming process is not as linear as this tutorial so don't worry if you have to go back and fourth between stages in this tutorial! Anyway, hope you like it and if you have any questions do not hesitate to contact me, i'd be more than happy to help out :)

Part 01: Project set-up and basic requirements of XGen This is by far the most important part of the tutorial and is often the reason for problems I have seen in people projects, before talking in detail here is a brief checklist of the key considerations when you are adding XGen to your project. - Make sure that a Maya project is set! - Make sure that you have consistent naming conventions in your project. - Check your scale, this is especially important if you want to simulate your groom. - Make sure to have clean UVs (This is something that I will cover in part two of this tutorial) Okay, so those are the important bits for this section so please take care with them. So, why is setting a project so important? Since saving raw geometry for your groom per scene would be incredibly heavy XGen simply recreates your groom based on a set of maps, expressions and basic rules, because of this XGen relies on relative file paths in order to find files it needs to recreate your groom in each scene where it is loaded. When you create your project and load XGen for the first time you'll find that in your project folder there will be a new 'XGen' folder, this is where all of your collections, descriptions, maps and mesh bindings are written to and it is incredibly important that this folder does not get moved. If it does move you can expect XGen to no longer load correctly in any of your scenes. Why are naming conventions so important? Good naming conventions are generally important for most projects but the moment you add XGen... well, you'll get fucked up if you naming conventions are not clean. Why is this? Well as mentioned earlier XGen recreates your grooms every time it is loaded and to do this it needs to know two things, the file path to your collection and the name of the geometry the hair will be grown from. If either of these are not what XGen expects than it will simply not work, lookout for namespaces when you import/reference your models since these can quickly get out of hand. In this tutorial we will make use of 'scalp' geometries to grow out hair from so what I like to do is create a group which contains all of my scalps and give them names like "Moustache_Scalp_GEO". Why is scale important? Again, scale is normally important in most pipelines but once you start using XGen it too becomes more important, especially if you are planning on simulating your groom. If you don't want to simulate then the actual scale of your model is not as important but you must still keep it consistent, constantly changing the models scale can be a real pain for the groom artist! (it's still good to work in real world scale anyway) Why are UVs important? If you want to only work in Maya: So there's a bit of an oddity with XGen which is that as far as I am aware XGen has no real issue with UDIMs (Or multiple UV tiles) due to the fact that XGen using the PTEX format for the grooms. However, XGen relies on the Maya paint tool in order to create maps for your groom attributes. This is a problem since the Maya paint tools do not work with UDIMS. So if you plan on using them for your character you have two options: - Create scalp geometries and give them UVs in the 0-1 UV space - Create a UV set for your existing geometry For a student pipeline I think it is easier to create some scalp geometries as this allows us to make more use of our limited UV space to create more detail on out maps without needing very high resolution maps. If you don't mind using multiple software packages: Alternatively, you can bypass the need for UVs altogether by painting PTex maps directly using either Mari or Mudbox. Doing this has a few key advantages, first it not having to use the Maya artisan tools and instead being able to use much nicer brushes for painting variation into your maps. It also completely bypasses UVs which is nice :) The only real downside is slightly slower iteration time since you have to take more steps to update the maps you are using. To load a custom ptex map into xGen simply drag and drop the file path into the attribute you want it to drive. Make sure that this path is relative and that the file is saved within the XGen folder. How is XGen structured? XGen uses a pretty simple file structure to store any relevant files that you create and the basic setup goes like this: -Project -XGen folder -Collections - Collection folders for your project -Descriptions - Modifier folders - Maps - Points - Connectivity file You don't really need to worry too much about this structure since XGen will take care of that for you but if some of you files go missing you know know where to replace them :) There is also an additional XGen file created whenever you save a scene and this file is vital for XGen to load when you open your scene. This file will be saved wherever you scene is stored and will share the same name as your original scene: i.e. "charBob_Groom_PUBLISHED.ma" would be saved with "charBob_Groom_PUBLISHED.xgen" If you want more in depth info about how XGen works than please follow this link: http://docs.sharktacos.com/vray/xgen.html
Part 02: Preparing your model for groom So, before we can start creating our groom we first have to prep our model to make all future work much easier to carry out. As mentioned earlier this tutorial will use a "Scalp_GEO" method for growing our grooms. First thing we want to do is to make sure that our base object has UVs, is named/grouped correctly and at a correct scale. Also make sure that you delete your history and freeze transformations to make sure that the mesh is as clean as possible! From here we can start making our scalps :) Duplicate your base mesh and select the faces where you want there hair to be grown from for that particular groom. Then grow your selection so that the selected area is larger than what you want for the hair, this is important since it is very easy to mask out an exact hairline when you have more geometry than you need. From here just invert your selection and delete, you should now just have a floating piece of geometry for your groom, name it and put it in a new group.

Rinse and repeat these steps until you have all the scalps you will need for your groom! (It also help to create display layers in order to keep your scene clean.) It is important to note that you should never move these scalps, the vertices of the scalp should exactly match their corresponding vertex on the original base mesh. This is so that when connecting your scalp geometries into a rig you can use a simple wrap deformer and get perfect results with very little work. Finally, project a new UV for the scalps and unfold. For most grooms you're scalps will not need any cuts on their UVs and can just be projected and unfolded. Just make sure that they are in 0-1 UV space! That's pretty much it but here's a quick note for the rigger for your project. Please do not just parent the scalp geometries to joints as XGen will not recognise its movements at rendertime and thus the hair will not follow the mesh. Instead, copy your weightpaints onto the scalp OR use a wrap deformer to attach to scalp to your base geo. (The scalp geo does not need to be visible in viewport in the rig or at rendertime since its visibility has no effect on XGen outside of the initial grooming set up)

Part 03: Starting your groom It's time to create our grooms :D First you will need to load your XGen plugin if you have not done so already, then open the XGen description editor. This should now open a tab in the attribute editor, simply select your scalp geometry and click create new description, now set the name of your description and collection appropriately and turn on "placing and shaping guides". In terms of naming its entirely up to you as there is no "correct" way to name anything as long as it is clearly defined. For examples sake if I was making a moustache for my character Bob I would set the names as follows: Description: "Bob_Moustache_DESC" Collection: "Bob_Grooms_COL"

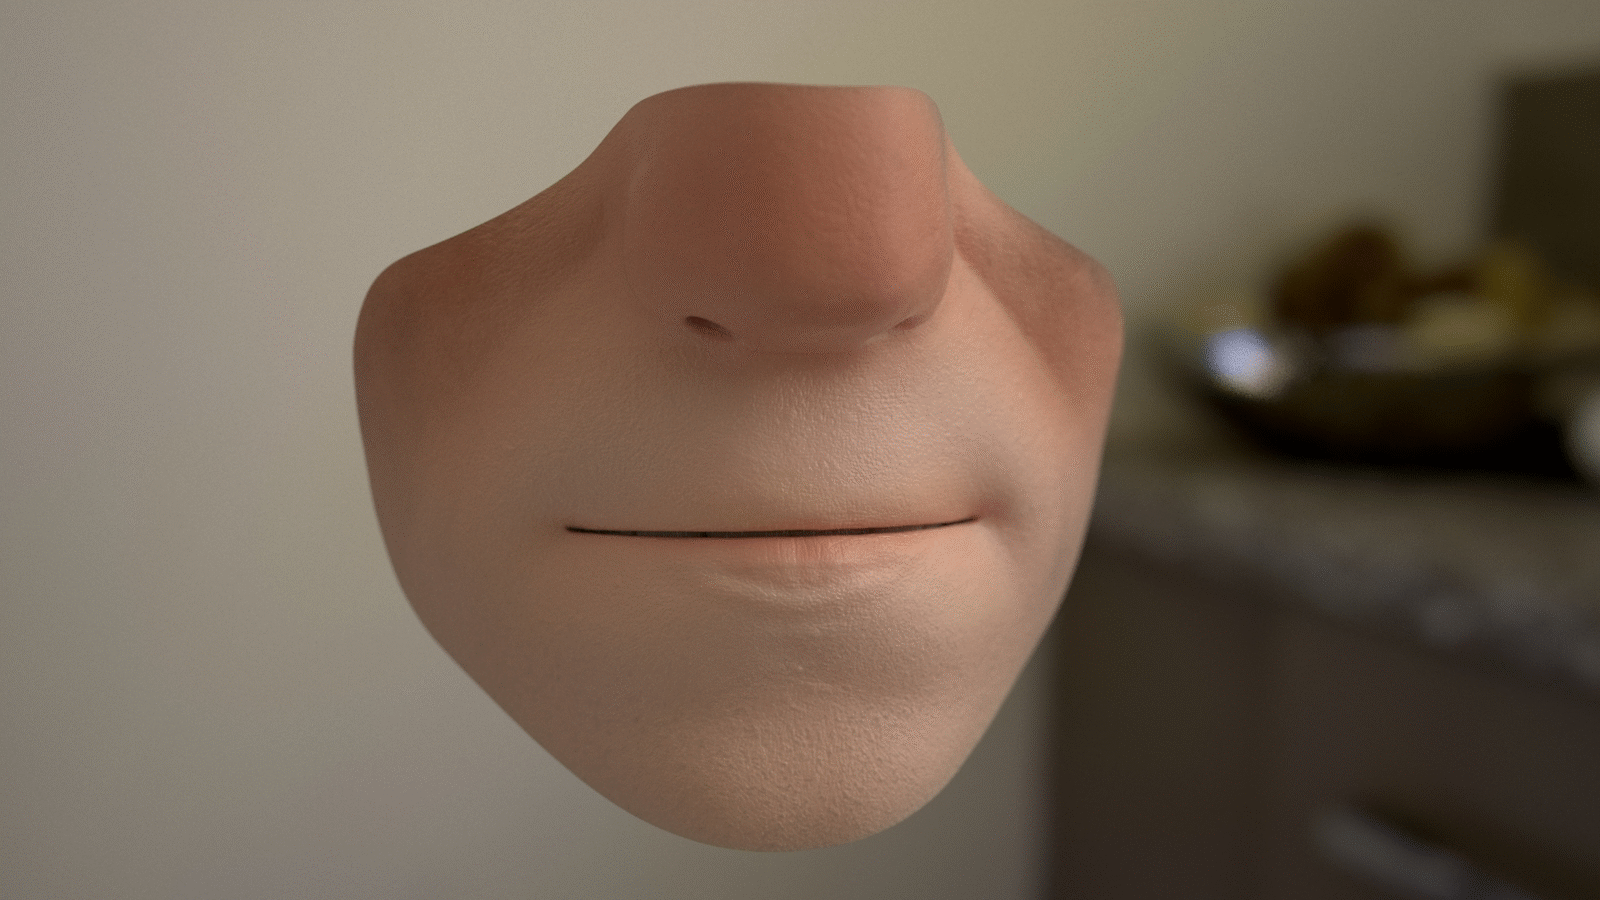
So now that we have our groom description set up it's time to start placing our guides. One quick note with XGens guide system is that one nice little feature it has which is automatic interpolation for newly placed guides, I like to abuse this feature by having the first two guides I place be the two that are furthest apart. Doing this means that you will not have to do as much work when blocking out the primary guide positions since XGen will try to do this for you to a basic level, and it will only get more accurate as you place more guides :) There's really not too much I can say in text form to help in deciding to place guides but I should be making a short video series for this soon which will show the process in a little more detail. In the meantime I can say that there are a few key considerations when placing your guides: - Try to keep their spacing as even as possible and avoid large areas on the scalp that don't have guides. - Depending on your groom it is normally good practice to place guides around the perimeter of the scalp, this will lead to better termination of the hair since XGen will have some extra guides to interpolate with. - Keep track of the number of CVs on your guide curves, for short hair styles the default of 4 CVs is fine but for more complex shapes try increasing this number. (You can do this using the "rebuild" option in the guide tools section of the primitive tab). Also, if you plan on simulating your groom, this CV count should be increased to give you more accurate simulated results :) - Pay particular attention to the silhouette of your groom as well as the overall flow from region to region. Important note: At the time of writing this tutorial this groom is more than half a year old and I have to say that the guides here are not really dense enough to give full control over the groom or any aspect of simulation (especially those brows!). However, it did get the job done. Just keep in mind that the guides on display here are super minimal and are only suitable for student work.

Once you have your guides blocked out we need to start generating the hair, you can do this using the first button in the XGen interface. Now you need to set your density, hair width and taper, the exact settings for which are incredibly dependent on scale and type of groom so you'll have to tune these settings by eye. Oh and make sure that the hair CV count is high enough for the hair to capture the shape you want. You can do this in the primatives tab, just scroll down until you find the primitive CV count and increase this number until the hair matches the guide shapes. This becomes more important once you start adding curl/noise modifiers.
Part 04: Adding modifiers Once you have your basic groom set up with the density, guides, and hair width you want it is time to start adding your modifiers.It is important to note that modifiers are calculated from the bottom to the top and clumping is always calculated first in the stack, please consider this when changing the order of your mods. First, I'll give a brief description of the primary modifiers used in most grooms.
Clumping: Clumping is the most important modifier for most grooms and basically serves to attract multiple strands of hair in to primary form (or clump). Hair often consists of several layers of clumping with a minimum of 2 in most cases. When combining layers of clumping it is important that each layer has a different number of clump guides and that this number increases with each addition of clump mods. To set the number of clump guides just click "setup maps" in your clump modifier, this will open a menu where you can control how these guides are generated. If you don't increase the number with each layer of clumping than at rendertime they are know to flicker which is pretty ugly. Which modifiers you use depend entirely on the type of hair you wish to make but as a general rule I like to start with 1-3 layers of clumping modifiers as this is the most dominant effect seen in hair for most grooms. Clumping also contains its own modifiers which are located in its attributes, i'd recommend paying with these as they give you a lot of power to very quickly change the hair style. Noise: Noise is typically used to add a natural shape variation on all the strands of hair since in real life people tend not to have perfectly straight hair. Noise can also be applied to a random percentage of hair using stray expressions but I will get back to that later Cut: Cut is used to shorten the hair by a specified amount. this can be used with a random expression (which is used by default when you create a cut) and add random length variation to he hairs. Coil: Coil is used to add curls to the hair and can be used on individual strands or on clumps. That's it, it's pretty simple :) There are many other modifiers but those four mods are all you need to create most grooms and many of the other modifiers and tend not to change the look of your groom. Note: I am aware that this section of the tutorial is way too short to really learn anything from but there is a reason for this. Just googling "xGen tutorial" will give you 100's of videos about how to groom and use the modifiers, I don't really see much point in spending too much time here :)
Part 05: Adding strays There are two primary methods people use to create stray hairs that can be used in XGen and the first (and my personal favourite) is using expressions. To do this you will first need to define your stray percentage which can easily be done by clicking on descriptions - set stray percentage, then simply enter a value for what percentage of hairs you want to be considered strays. Once this value is set create a simple noise modifier and enter the following expression into your magnitude: stray() ? 4:1 The first number represents the value set to the stray hairs and the second value represents what value is applied to non stray hairs. These numbers can be any value or even smaller expressions which means you can have much more control, generally speaking I like to use random values for both strays and non strays using the following expression: stray() ? rand(3,5):rand(0,1)

There is one other way which some prefer which is using procedural noises, to do this simply connect a noise map into your magnitude :) This is a method I don't tend to use when working with xGen so I cant give much advice however Tarkan Sarim is known to use this method so I recommend checking out his tutorials to see the noise workflow in action ( I will leave a link in the resources section at the end of this tutorial)
Part 06: Exporting your groom (And some rig stuff) (This section would be pretty small if I only talked about exporting so i'll mention some other stuff to) Once you are finished with your groom you will want to save it out into an xgen file, this will allow you to import your groom back onto the model after it has been animated.To do this just go into your xgen editor and click "File - Export collection or description", once this file is saved out make a backup of the file and save it somewhere secure, having a backup of your collection may save your project when you least expect it! Right, one quick thing I want to bring up due to some experience I have had with xgen in a animation pipeline, don't bother putting XGen in you rigs, all it does is cause instability and trouble with referencing. Yes, XGen can now be referenced but with core XGen it is only stable in its first reference, by that I mean you can make your groom in the model file and reference that into the rig but when you try to reference the rig you will start to get issues because of the namespaces. There are two ways to work around this, you can flatten references when you publish the rig but in my opinion a much better way is to ignore XGen and just model some proxy hair for the rigger and animator to use. You can just load XGen in after animation is done but I'll get back to this later...
Part 07: Shading basics For this tutorial I will be using VRay but I may cover other render engines such as Arnold at a later date. To attach a shader to your groom simply select your xgen description in the outliner and middle click-drag your shader onto the description (that's the easiest way) When shading your hair in vray you will want to use the vrayHairMtl3 as a base for your materials and there are a few things that you need to know about hair shading. First off, set your diffuse to black since natural hair has no real diffuse interaction with light so adding diffuse can make hair feel like its full of hair products even when it is used subtly. Instead, try to get your hair colour from reflection 2 and translucency and try to have both of these colour be the same so that the hair reacts as expected under many different lighting conditions. In terms of what colours you can use its up to you but if you want a plausible hair colour you will want to sample colours from the melanin chart in this paper: http://www.eugenedeon.com/wp-content/uploads/2014/04/egsrhair.pdf The melanin chart in this paper by weta digital contains every natural hair colour and simply colour picking from the chart and plugging that into your reflection 2 and translucency will give you natural results. You will also want to learn how to use the vray hair sampler node. This node allows for two very important things in hair shading which are find the length of a hair and the random by strand feature which does exactly what it says. Connecting either of these two outputs to a ramps UV coordinates allows for much more control over the look of the hair, my personal favourite use of this being the use of the hair length to drive transparency which allows you to soften the ends of the hair and make it look more fuzzy and soft as a whole.

Part 08: Adding groom to animation So, earlier in this tutorial I mentioned that in my opinion it is best to leave your groom out of your rig, so what do you do? Well here's an overview :) First, finish your animation in the rig as you normally would and then create an alembic cache of the model. Make sure that you export the almbic in world space and that UV write is turned on so you get to keep your UVs. Next, go into your lighting/rendering scene and import the alembic cache of your model with namespaces turned on, you should now be able to see your model in the scene with its animation. Now you need to go into window - general editors - namespace editor and delete your namespace for the alembic cache, this will ensure that the name of the mode lis the same as the scene it was exported from so that XGen will recognise it :) Now that your animation is set up and ready to go, open your XGen editor. If there no other grooms or XGen archives in the scene the editor will be empty and will give you the option to import a collection, just click that and your groom should now be in the scene (you may need to save and reopen the scene for it to appear sometimes) . If there are other grooms or XGen archives in the scene you can just go into the XGen editor and click File - import collections or description. If the groom has not imported properly check your UVs, model name and scale and compare that to the original groom file, if any of these have changed you will need to go back and correct this change (Refer to part one of this tutorial for why these are important)
Part 09: setting up dynamics
Setting up dynamics in guide curve grooms is actually really easy with xGen. First just make sure that your guide curves have enough cvs to define their shape without the CV points being too far from the curve, if the CV points are too far apart it will result in low quality simulation. You can fix this by using the rebuild curves too in the primitives tab, the number of CVs needed depends on what shape and how long the guides are so just use any value where the CVs do not float away from the curves and you should get ok results. Once your CV count is correct we can start setting up our simulation. Find the animation tab in your xGen description panel and turn animation on, make sure that live mode is active and then click create hairSystem. This will then create some dynamic curves in place of your guides with the same CV count as the original guides. Now, I'm not going to go into much detail with simulation settings because frankly I don't feel like I know enough to properly teach that but I will give a general guideline for the basic set-up, I will add some resources at the end of this tutorial for learning what all the settings do. First, you're going to want to select any meshes your hair will collide with (body, clothing, ect) and set them as a passive collider so that the hair will interact with the objects, you can do this using the nCloth menu in the simulations tab (nCloth - create passive collider). In order to change the simulation properties of your hair you will need to open the outliner and select 'hairSystem' and then look in your attribute window for the 'hairSystem1Shape' tab. As you can see there are a lot of settings for every aspect of simultion but the most important setting to set first is your start curve attraction as this setting allows the groom to hold its shape during animation. I tend to set this to a value of 1 and use the "attraction scale" graph to set the tips of the hair to have more movement than the root.
Part 10: caching dynamics
Now that we have a basic simulation set up we need to make sure that we save out our results, this is commonly called caching and there are many different formats we can use, by far the most popular is Alembic (.ABC) as this format is basically bulletproof. To convert our simulation into an alembic cache we first need to select the output curves of our simulation in the outliner, from here go to cache - alembic cache - export selected to alembic. With the option box for this open scroll down to the export settings and make sure that you are caching the entire frame range that you need and cache it with the 'world space' checkbox enabled. From here simply select where you want it to be saved, name it and hit export (depending on the amount of curves you need to cache this could take a few minutes)
Now that we have our cache saved out we need to load this into xGen for use as guides. Simply go back to the animation tab in the xGen description and turn off live mode, then just load the cache into the animation path. That's it, you're done :D
Feel free to scrub through your viewport timeline to preview the animation of the hair guides.
Part 11: Rendering animation So, we have our groom looking how we want and our simulation is not exploding all over the screen when we hit simulate, looks like its time to render out our animation! :D There's not much we need to do to render animation with xGen but it is very important that you get it right otherwise you'll lose a lot of time to broken renders. First, you need to export patches for bath render, what xGen means by this is you need to create an alembic cache of the geometry your hair is growing from. simply go into collection - export patches for batch render, now set "use animation" and set the frame range of your animation. This will then create an alembic cache of the scalp geo and save it in you scenes folder. Here's a few important notes: - You only need to export patches for batch render ONCE per collection - If you make any changes to your animation you will need to repeat this process - If the name of your scene changes you will also need to export the patches again, since the patches are save for the specific scene you are in. - After you have you scalp cache exported it it is automatically connected to your groom, there is no need to do anything with the file yourself After you have cached the scalps we need to make sure that xGen know which render engine you are using. Simply set the render you want to use to your chosen render engine and scroll down until you find "Force render to use cache" (This checkbox may change name for different engines but it will always be there. Checking this box makes sure that your caches are actually used when rendering, no idea why this is off by default...
Artists advice I asked a few other professional artists for what their main advice would be and managed to get a few great responses.
"For me it would all about keeping your scene neat and tidy and optimised. Have less modifiers with nicely painted control maps. Remember that other artists may have to pick up your scene, so the simpler it is the better. Also really study the reference. It's relatively simple to get a groom to look 80% believable, but it's the last 20% fine details which really sets apart a decent groomer from an awesome one. For guides....the less the better. Again remember that other artists may have to pick up your scene and edit the guides. Can still achieve the look with less guides and some added modifiers added for extra procedural breakup" -David Mayhew, head of groom department at MPC
"- As with anything in 3D, work from big shapes to small shapes. - Never rename your scalp geometry, you're asking for trouble - Always create a scalp geometry, never grow the hair from the actual model, xgen is ptex based and ptex doesn't handle topology changes well - Always try to split up the hair into the different aspects, trying to control everything in one groom is unnecessary complex" -Zeno Pelgrims, Lead shading artist at Illion Portfolio: http://zenopelgrims.com/
"When it comes to creating animal grooms people tend to create it as one set in xGen. The best approach is to split the groom in multiple sets such as head and body and even legs to make sure you get the most control. However make sure the sets are overlapping and you paint some density maps (not to be confused with the mask) to avoid a weird thick line in your groom where the hairs overlap. By splitting grooms up it makes your life easier painting density maps for long and short fur. Multiple sets can also be used for digi-double, for example adding extra stray clumps which you can get procedurally in xGen. Also, don't forget to name everything otherwise the next artist picking up the groom will have a nightmare of a time" -Josh Cann, Groom TD at MPC Portfolio: https://www.artstation.com/joshmjc
"- Make sure to work with nice UV on Scalp Geometry because you gonna paint the maps on UV before converting it to PTEX, Which can change the quality of the map. - After creating the scalp geometry, Make sure to not translate it or rotate it and freeze its transformations. This will cause you big problem if you gonna use "anim wires modifier". - When it comes to rendering always make sure to thinner small part of the root using the "Width Ramp" under primitive tab section, This will give you nice blending between the hair root and the head with no extra rendering time.” -Obaida Hamdi, Director/Founder at CGLYO Portfolio: https://www.artstation.com/obaidoo13
Resources and special thanks First things first just want to say that's to all the guys who gave a quote for the artist advice section, it was great to see how different artists have differing priorities in what beginners should learn, Hopefully that would have helped a few people out :) If you have any questions regarding this tutorial or anything surrounding grooming do not hesitate to contact me and I'll be happy to help! Anyways, here's a few more resources which may come in handy: The light collab: http://docs.sharktacos.com/vray/xgen.html
Autodesk documentation: https://knowledge.autodesk.com/support/maya/learn-explore/caas/CloudHelp/cloudhelp/2016/ENU/Maya/files/GUID-47644337-40F0-4766-BD3B-4104F9F9B7E2-htm.html Tarkan Sarim on Patreon: https://www.patreon.com/tarkan_sarim Jesus FC on Patreon: https://www.patreon.com/jesusfc Tom Newbury on Gumroad: https://gumroad.com/tomnewbury# Bjørn Blaabjergs website: https://blaabjergb.com/xgen-tutorials/
Weta digital research paper: http://www.eugenedeon.com/wp-content/uploads/2014/04/egsrhair.pdf